Multiple Git repository status awareness & grading app – updates

In the post last week I mentioned that I’ve added new features to the tool I use in Data Structures and Algorithms course to supervise, support, test and grade the student programming course work. I’ll describe here the new features and provide some (hopefully) interesting implementation details about those.

Background about the course that helps in understand the role of this tool:

  • students each have their own github or gitlab repository to where they fork the initial status of their course work from the teacher repository,
  • repository contains the task instructions, skeleton code to implement, unit tests code and other supporting code given ready for students,
  • repository tests enable testing the student’s implementation of the data structures and algorithms that are required to implement in the course,
  • teachers have access to the student repositories to assist students with any issues, and finally to grade the work.

Before going into details, a comment about the motivation for this tool to exist in the first place: The course the tool is used in, has 300+ enrolled students and only two full time teachers (sometimes we do have 1-2 assistants with small number of hours, like 50 hrs in total for the whole Autumn), simultaneously teaching 2-3 other 200-300 student courses. That totals around 900+ active students taught simultaneously, so providing individual support and attention to all is practically impossible, at least if no automation (and other support tools) is taken into use.

So the critical thing in managing all this work is, that we do need automated tools to:

  • keep track of how the students are progressing in the course and help those who desperately need it, and after the last deadline,
  • to evaluate and grade the students’ programming submissions as fast as possible.

The grading should be done in three weeks after the last deadline, so it cannot be done in time manually. The aim is to use this tool during the course, trying to catch those students that are not doing OK, and then try to contact and help them in getting their coursework going and spotting any possible mistakes in their work so that they can correct their mistakes before the final deadline.

Students next Fall will receive the same unit tests and the same code analysis tools (in Java unit tests) they can also themselves use. However, this is not enough, especially if the students do not contact the teachers about their issues soon enough or at all. A problem that is too common, unfortunately.

The new features added to the teachers’ tool during this Winter and Spring are:

  1. Automatic source code analysis:
    • results of the source code analysis are stored in a database table; repository table has a column where problems found in code are flagged,
    • tool checks for java imports that are not allowed, notifies about this and sets error flag in the database table,
    • tool also uses the Antrl parser generator to check if method implementations in the source code violate any rules and if the code does not do the things it should do.
  2. Remote repo checks for both github and gitlab:
    • checks that remote is not public, the rule of the course,
    • checks that remote has only allowed contributors.
  3. Testing and grading enhancements
    • tests are now grouped to grade level tests,
    • when all tests in a grade group passes, grade is stored to repository table,
    • grade tests can be executed in whichever order, since grade value is bit flag,
    • test for a certain student repository can be disabled if they cause issues like tests never ending or taking way too much time,
    • if git pull updates code, grade is set to zero and test results are cleared.
  4. Status reporting
    • the tool now generates a textual status report that can be sent to student by email, listing how test pass, if any forbidden things are used / things to use are not used, git statistics etc.

Let’s take a closer look at the code analysis done by the tool in this post. The other features are left for future possible posts to discuss.

Analyzing if the source code uses “forbidden” imports was implemented with simple text parsing techniques. The tool goes through the Java source files in a certain directory where student code is located, reads the .java files and checks if the source uses imports that are not allowed.

For example, when implementing a Stack data structure, student must not import the java.util.Stack and just use it instead of implementing their own stack from scratch, using an array as internal data structure. Or when sorting an array, java.util.Arrays is not imported and Arrays.sort is not used, because student should have used their own implementation of the sorting algorithms.

These kinds of mistakes can be found by analyzing the imports in the student’s .java files. You cannot call Arrays.sort without having import java.util.Arrays in the .java file.

The tool first reads a rules file that contains the import rules for the course:

[allowedImports]
*,import java.util.Comparator
*,import java.util.function.Predicate
*,import oy.interact.tira.
*,import java.lang.Math;
*,import java.util.concurrent.atomic.AtomicInteger;
CodeWordsCounter,import java.io.
CodeWordsCounter,import java.nio.
SetImplementation,import java.util.Iterator

For example, the java.util.Comparator may be used by the students in all of their .java files (*). The same goes with java.util.function.Predicate and all the files in package oy.interact.tira (the course source packages). The class SetImplementation may also import java.util.Iterator.

Et cetera. As you can see, this is an allow list, not a deny list. The imports that are allowed and can be used in the course are small in number, so it is easier to have an allow list than deny list.

Reading the allow list and analyzing the source files was straightforward to implement by simple file handling and text parsing. First read in the rules file and parse the import rules from there, into this structure:

fileprivate
struct SourceRequirementsSpecification {
   var allowedImports: [String: [String]] = [:]

The Swift dictionary object allowedImports has the class as the key (either * or the name of the class rule is about), and then the array of allowed imports the class may contain.

Then the tool starts reading the student .java files and handles all lines beginning with import to check if that class may import that specific thing or not. If the .java file imports something that was not allowed, the tool database table (for the student’s repository) having a column with integer value, a specific bit in that number (a “flag”) is set to 1 (true). This indicates that the student’s code imported something it was supposed to not do.

This is the data structure keeping track of these repository flags, if they are set or not set:

struct Flags: OptionSet {
   typealias RawValue = Int16
   var rawValue: Int16

   static let remoteFails = Flags(rawValue: 1 << 0)
   static let buildFails = Flags(rawValue: 1 << 1)
   static let usesForbiddenFeatures = Flags(rawValue: 1 << 2)
   static let repositoryIsPublic = Flags(rawValue: 1 << 3)
   static let repositoryHasOutsideCollaborators = Flags(rawValue: 1 << 4)
   static let repositoryTestingIsOnHold = Flags(rawValue: 1 << 5)	
}

The Swift OptionSet is a type that presents a mathematical set interface to a bit set. So each flag is a single bit in the 16 bit integer, being either off (0) or on (1). So instead of having six boolean columns in the database table, I can have one 16 bit integer column to store 16 different flags. Most of those still available for future needs.

The flag usesForbiddenFeatures is set in this case of student code using forbidden imports (or other features, discussed below). Other flags are used to:

  • track if the remote repository cannot be accessed at all (remoteFails) or is empty,
  • compiling the code fails (buildFails),
  • repository is public even though it must be private (repositoryIsPublic) and finally
  • if the repository has other collaborators than the student owning the repo and the course teachers (repositoryHasOutsideCollaborators).

These are all issues that have been met in the course during the previous years.

Final flag repositoryTestingIsOnHold can be set manually from the tool user interface for those repositories that mess up the testing, either because the tests are stuck or take too much time and therefore should not be executed before fixed.

That flag struct is a 16 bit integer, the datatype of the database column storing the flags in each student repository database table. If the code has issues related to these rules, the flag is set. When the git repository is updated from the remote, the user needs to run the code analysis again. If a violation of a rule was fixed, the flag is then reset to zero (false), if no other violations are found.

The imports checking from source code is not enough, though.

Sometimes students do mistakes in method implementations they are not supposed to do. Like when implementing a recursive binary search, they implement an iterative binary search. Or when sorting a table in descending order, they first sort in ascending order and then reverse the table order. Since time efficiency is the major topic of the course, this is not what they are supposed to do. Instead, they should use a comparator to sort the table to descending order in the first place, and then no reverse operation is needed at all, making the operation faster.

For checking these kinds of issues the import rules are not enough since these kind of mistakes can be made without importing something. Therefore, the same rules file contains also rules like this:

[codeRules]
# Algorithms.binarySearchRecursive must contain word binarySearchRecursive
Algorithms.binarySearchRecursive,must,binarySearchRecursive
# Algorithms.binarySearchRecursive must not contain word while
Algorithms.binarySearchRecursive,mustnot,while
Algorithms.binarySearchIterative,must,while
CodeWordsCounter.topCodeWords,must,Algorithms.fastSort
CodeWordsCounter.topCodeWords,mustnot,Algorithms.reverse

Here lines beginning with # are comments and ignored by the tool. Illustrating the examples of mistakes above, the rule:

Algorithms.binarySearchRecursive,mustnot,while

specifies that the algorithm binarySearchRecursive in class Algorithms must not contain the keyword while. Since breaking this rule implies that the student has implemented the recursive algorithm using iterative approach. Therefore, the learning goal of implementing a recursive binary search has not been met, and code needs to be fixed.

These rules are also parsed from the rules file into the above mentioned rules structure, which now looks like this:

enum Rule {
   case must
   case mustNot
}

struct CodeRule {
   let methodName: String
   let rule: Rule
   let stringToMatch: String
}

fileprivate
struct SourceRequirementsSpecification {
   var allowedImports: [String: [String]] = [:]
   var rules: [String: [CodeRule]] = [:] // ClassName : CodeRules
}

In addition to the allowedImports rules, the structure now contains also rules for a class (the Swift dictionary key String has the class name), where the CodeRule structure has the name of the method the rule is about, then if the method must or must not (Rule) contain the string to match.

This is a very simple current implementation, and as I develop this further, it may change to something different later. For example, it should be possible to say that the recursive binary search algorithm must not contain “while” but also not the “for” keyword.

The second example about being able to realize that descending order can be implemented by a specific comparator (instead of ascending sort and then doing reverse, which is more time-consuming operation) is checked by the rule that the class CodeWordsCounter in the algorithm topCodeWords (where the work in the coding task is done) must not call Algorithms.reverse.

If a student uses the Java Collections.reverse or Apache Commons ArrayUtils.reverse for this, that mistake is already caught using the import rules.

For this feature implementation, I used the Antrl parser generator. Antlr has existing grammars for many languages, including Java, and it supports generating parsers also for Swift. So all I needed to do was to get the Antlr tool and the Java grammar files (Java20Lexer.g4 and Java20Parser.g4) and then generate the Java parser and lexer for Swift:

$ antlr -Dlanguage=Swift -message-format gnu -o Autogen Java20Lexer.g4
$ antlr -Dlanguage=Swift -message-format gnu -o Autogen Java20Parser.g4

Those commands place the generated Swift source code files in a subdirectory named Autogen.

Using the generated Swift code from Autogen, the tool can then parse Java code. All I needed was to implement a class that extends the Antlr generated Java20ParserBaseListener, give the rules to this class and start parsing the source string read from the student’s java file, containing the Java source code:

import Antlr4
class Java20MethodBodyChecker: Java20ParserBaseListener {

   private let file: String
   private let rules: [CodeRule]
   private var currentMethod: String = ""
   private var stream: ANTLRInputStream? = nil

   var violations: [String] = []
	
   func start(source: String) throws {
      stream = ANTLRInputStream(source)
      if let stream {
         let lexer = Java20Lexer(stream)
         let parser = try Java20Parser(CommonTokenStream(lexer))
         let parserTree = try parser.compilationUnit()
         let walker = ParseTreeWalker()
         try walker.walk(self, parserTree)
      }
   }
// ...

Analysing the code happens in the overridden handler for parsing Java methods, enterMethodDeclaration. There, the implementation checks, using the rules, if the Java code contains any keywords that should not be there or does not contain keywords that should be here:

override func enterMethodDeclaration(_ ctx: Java20Parser.MethodDeclarationContext) {
 if let identifier = ctx.methodHeader()?.methodDeclarator()?.identifier() {
  currentMethod = identifier.getText()
  let ruleSet = rules.filter( { $0.methodName == currentMethod } )
  if !ruleSet.isEmpty {
   if let body = ctx.methodBody() {
    let bodyText = body.getText()
    for rule in ruleSet {
     switch rule.rule {
      case .must:
       if !bodyText.contains(rule.stringToMatch) {
        violations.append("\(file).\(rule.methodName) ei käytä \(rule.stringToMatch), vaikka pitäisi")
       }
      case .mustNot:
       if bodyText.contains(rule.stringToMatch) {
        violations.append("\(file).\(rule.methodName) käyttää \(rule.stringToMatch),  vaikka ei pitäisi")
       }
     }
    }
   }
  }
 }
}

The violations then contains all the things found to be against the rules.

This worked, except for one thing: if the code has comments that do/do not have the specified keywords of the rules, the code analysis did check those comments also. Even though the comments do not influence the implementation and are therefore totally irrelevant.

So if the comments of recursive binary search algorithm contains the keyword while, the tool would report that as a violation of the rule! Or if the code contains a required keyword, but not in the actual code implementation but only in the comments, the analysis would be satisfied. End result: not satisfactory at all.

First I started to fix this by implementing code myself to remove the comments from the code in a String variable before the analysis, but soon I realized that the Antlr parsing tool should somehow already handle this.

What I did instead, was (after some searching on the internet) to modify the Antrl lexer file for Java so that it does not parse the comments at all, but skips them:

// AJU: COMMENT: '/*' .*? '*/' -> channel(HIDDEN);
COMMENT : '/*' .*? '*/' -> skip;

// AJU: LINE_COMMENT: '//' ~[\r\n]* -> channel(HIDDEN);
LINE_COMMENT : '//' ~[\r\n]* -> skip;

Then I regenerated the Swift parser and lexer source files and added them to the tool project.

Using the new lexer/parsers, the parsed Java code does not anymore include comments and I do not have to consider them at all! This works perfectly.

Without asking anything about any “AI” tools out there. As usual, I do not touch them even with a long stick. I prefer to discover and learn myself, as long as the internet is not polluted with “AI” generated crap which makes everything impossible.

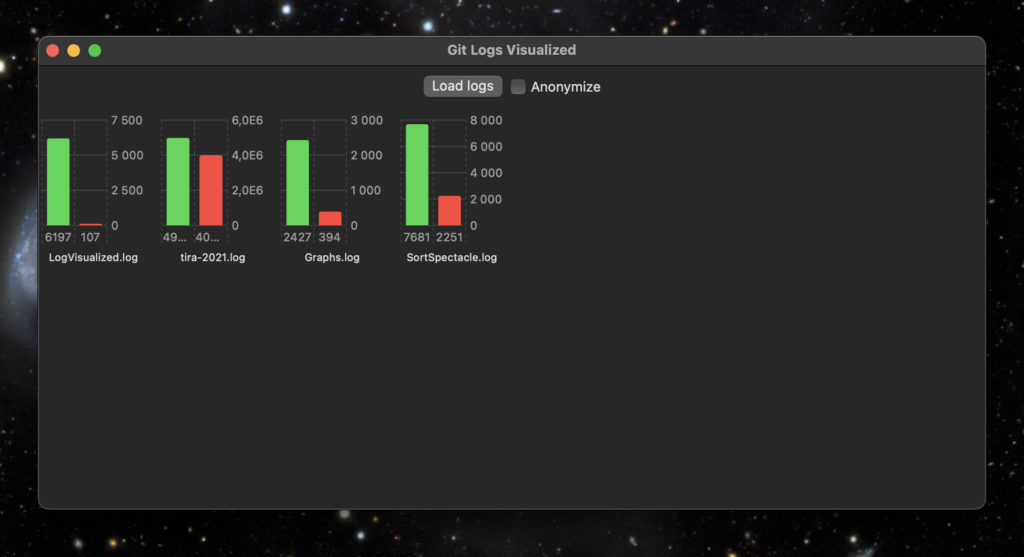
Below you can see the tool reporting about imports in a student repository, imports that should not be in the code, and that the code in CodeWordsCounter.topCodeWords does not call Algorithms.fastSort, even though it should, based on the rules in the rules file.

As you can see, the first violation is because the student has misnamed the class as setImplementation. In Java, classes (and therefore also class files) should always begin with capital letters and the name should be SetImplementation instead. So this is a mistake, but actually does not violate the import rule; the Set data structure implementation may use the Iterator. Therefore, when the rules are found to be violated, it often requires human rechecking to make sure no unfair judgments are made by the automation.

Considering the 300 something students in the course, perhaps each of them making at least 3-5 mistakes the code analysis could find, this results in 900-1500 mistakes in total. For the teacher to comb through all the hundreds of lines of code in each of the student projects, repeatedly during the course, working on this “code quality control” task manually is very time consuming and therefore not a realistic task. Especially considering the available teaching resources mentioned in the beginning.

Hopefully the new features of this tool and the similar tests given to students in Java test code, improve the support the teachers can provide during the course to lead the students to the correct path of implementing the required data structures and algorithms.

The post is getting quite long, so the rest of the new features will perhaps be discussed in future posts. Unless I decide to focus on other more interesting topics. Have a nice day!

Multiple Git repository status awareness app

A year ago I started to implement a GUI app that I could use to track the 250-300+ student projects of my Data structures and algorithms course. The motivation for the tool was to answer the question:

How can you manage four courses with nearly 1000 students when you only have two full time teachers and two part-time supportive teachers to manage all teaching, evaluating and supporting the students in their learning in all of these courses?

Me

The plan was, that using this tool, I could more easily be aware of the statuses of the many student projects in this one course. And then when necessary, do something about possible issues.

Like, knowing that a student is left behind (no commits to the project in the last week or two), gives me a possibility to ask if there is anything I as a teacher could do to help the student to proceed in the course.

And if one or several of the unit tests of the various course programming tasks fail, especially if the task was supposed to be finished already, I could go and check the reason(s). Either by asking the student or taking a look at the git repository of the student myself.

The version last year required me to run shell scripts that would automatically retrieve the up to date code of the student from their remote repository using git pull. Output was directed to a log file the app then parsed to view the content. Similarly, tests were executed in batch from shell scripts with Maven (mvn test), result written to another log file. Again, the app would parse that log file to show in a graph how the tests succeeded or failed.

A while ago I decided that I would like to integrate all the functionality within the GUI app and ditch the separate shell scripts. Also, I decided that the information about the commits and test results would be saved into a database. This way, when app launch is now much faster since it does not need to parse the various log files to show content every time the app is launched.

Instead, when launched, the app reads the repository information, git log data and the test results from a database file. App launches much faster with immediately visible data. When I want to update the commit data for all student repositories, I just press the refresh button in the app toolbar and the app starts to pull data for each repository from the remote repository URLs.

Anonymised student repositories with commit and test data.

When I want to update the test data, pressing another button (the hammer button in the toolbar) starts to execute tests that are due, saving the test results in the app database. I can also refresh an individual repo from remote or execute tests for a single project to get a quick update on the status of the student’s project.

Until now I’ve focused on getting the tabular data visible. Yesterday, I implemented a similar commit grid view you can see in a person’s GitHub profile. This color grid shows the commits visualised for all student repositories:

Commit grid visualisation,

In this grid, time proceeds vertically from up towards bottom of the grid view. Each repository is one thin column on the grid. The timeline starts from the date the course started, proceeding down.

The grid ends at the current date in the bottom of the grid. So when the course proceeds the grid gets taller. Since this course displayed here started on September, the grid here is 42 days “tall”. This will give me a very high level visual awareness of level of activity among all the students in the course.

Obviously the usefulness of the tool depends on the fact (?) that students push their commits to the remote repository often, preferably daily or at least weekly. If they do not, we teachers cannot see them and this tool does not show them. As you can see, some of the repositories are in red, meaning there has not been a commit for over 14 days. Orange repositories indicate the most recent commit being over a week old.

Red and orange colors may mean that the student has decided to do most of the course progrmming just before the deadline. A common though not the best choice. So seeing lots of red at this point does not necessarily mean big issues with passing the course. We’ll see…

I’ve been constantly trying to motivate the students to do commits and pushing often. It is beneficial for them too – you get a backup of your work in the remote, and when you need teachers’ assistance, teachers have immediate access to the code from the remote.

Since the first real deadline of the course will be after two weeks, it is time for me to start using the information from the tool:

  • I can easily send email to the student not having recent commits, by clicking on the (redacted) blue text where student name is displayed – that will initiate an email I will send to the student.
  • Clicking on the repository URL (also redacted) will open the browser and take me to the remote repository web page of that student.
  • Another (redacted) blue line will open the local folder in Finder for me to start looking at the student project directory on my machine.

Those repositories in blue are all OK, and (probably) I do not need to be concerned with those. Especially if the scheduled tests also pass. The purpose of the tool is to let me focus on those students that probably need attention to be able to pass the course in time.

Some implementation details:

  • Implemented on macOS using Xcode, Swift and SwiftUI.
  • Uses Core Data as the app database, with five database tables and ten relationships between the tables.
  • Executes git and mvn test commands in child processes using Process class.
  • SwiftUI Table used for tabular content.
  • Commit grid is draw in a SwiftUI view using Canvas and GraphicsContext.
  • Uses the SwiftUI redacted(reason:) function to hide student information for demonstration purposes.
  • Student and repository data is imported from a tab separated text file exported from Moodle. There, student enter their information and the remote repository URL in a questionnaire form. The form data is then exported as a tsv file, which is imported to the app and all student data is written to the database. No need to enter the student data manually.

Nice idea for my git log visualiser

I could use this excellent idea in my Git log visualiser. Never thought I could do this! ?

Currently I am parsing plain text output from git log –numstat command, looking at certain order of lines and line beginnings to determine what is on the line.

Exporting from git log to JSON using jq like Simon does in his post would make parsing extremely simple using Swift Codable.

Posting this here to remind myself.

2022 retrospect

What did I do (professionally) during the year 2022? A long post about all stuff done – and mostly in progress. And a prize at the end…

First, l’ll list my active GitHub repositories of 2022. Some of these were created earlier than 2022 but I did work on these during 2022. Then I will list all the major teaching and other work done as part of my post as lecturer at the university.

So to begin with, here are the major and/or new projects I either started or took major leaps forward in 2022:

The largest project for 2022 is GitLogVisualized app (bash shell scripts, git, JUnit tests, Swift, SwiftUI, macOS) . I started to develop it in November when I realised that I need a way to quickly get an impression how all those 275+ students are doing with their projects in the Data structures and algorithms course. This way we can focus on providing help to those students that have a risk of falling behind the schedule.

Screenshot of the GitLogVisualized app showing repository statistics.
GitLogVisualized showing student projects (left column list) and the selected project timeline of commits and passing / failing tests. Student ids are redacted in this screenshot using the SwiftUI redacted feature.

Timed shell scripts are executed automatically every Monday night. Scripts do git pull from each student repository from GitLab, execute git log with certain parameters, then JUnit tests are executed, and all the data is saved in two log files per student repository. The app then loads these log files and shows the project state for each student repository.

Colour codes are used to quickly show if student hasn’t done commits in the last 7-14-19 days (blue, yellow, orange, red) so that we can immediately see who should be contacted to find out if we can do anything to help those left behind ahead in the course. Projects can be sorted ascending or descending order by student, number of git commits and days since last commit.

I am planning to release this app as open source when I get it cleaned up. And a demo video is also in my plans, as soon as I get to it.

Another major project is the TVT-Sanasto, a Java app (Java, Swing, JSON, SQLite database) students can use to learn the basic terms and definitions of different categories of computing and computer networks in Finnish/English. The app can also generate a graph (using GraphViz) showing how terms are related to each other.

Screenshot of the terminology app helping students learn ICT basic terminology.
TVT Sanasto Java app

Actually, the term categories can be anything, since the app downloads the terms from a server JSON file. So basically anyone can write simple terminologies with explanations in a JSON file, and that can be included in the terminology category index file. Currently these JSON files are hosted in GitLab. I am hoping that other teachers would contribute by writing additional term descriptions and perhaps even create new term category dictionaries for their own courses. See a YouTube video of the app.

I also have a Swift/SwiftUI version for the TVT Sanasto app that works in iOS, iPadOS and macOS (Swift, SwiftUI, SQLite database, localized for Finnish and English), but that is still a private beta. Hopefully I will finish this by next Fall when my courses begin. If I am still teaching them. Oh and one student actually implemented a web app using these JSON dictionaries. Nice that the app family expands this way and enables students use whichever tech they find suitable for their needs in learning the basic terminology of the field.

ICT Terms app running on iPad showing basic terminology like what is Boolean algebra.
TVT Sanasto app running on an iPadOS emulator.

Guesswork demo app (Xcode, Swift, SwiftUI, iOS) I implemented for GUI design/programming course in Spring 2022. Idea here was to demonstrate how to consider different screen sizes, zoom levels and screen orientations (portrait/landscape) as part of designing accessibility features in a (mobile) GUI.

iOS app screenshot of a demo showing a card guessing game.
Guesswork demo app GUI

MiniGolf scorecard app (Xcode, Swift, iOS) – originally a demo about localisation and internationalisation for GUI design/programming course. I demonstrated how to consider accessibility and enable localisation for two languages and also take into account different calendars (Gregorian, Chinese, …), zoom levels, etc. in GUI design in SwiftUI/Xcode development environment. After the course, I decided to make this a side project but hey, we all know what sometimes happens to side projects…

Screenshot of a demo grown into an app. Main screen of minigolf scorecard app.
MiniGolf side project, another one missing me while I am working for money at the day job.

QuestionGenerator (Swift), a command line tool to generate Moodle quizzes. This is for Devices and data networks course. The course is passed by an online Moodle exam, where I ask, among other things, conversions between different radices (numbering systems; binary, decimal, octal, hexadecimal) and simple calculations where values are from different numbering systems. This tool is really convenient in generating tens or even hundreds of random conversions and calculations for students to ponder. The tool exports them into an XML file Moodle can import as quiz questions. Saves time and work when teacher does not need to create these by hand and verify the correct result.

My Slippery Cities Apple Watch app – another side project, but this time already available in the App Store! – is going to get a new feature. I would have liked to release it during Fall 2022, but again too much day job work have pushed this forward, like many other side projects. The new feature is predicting slippery weather for pedestrians based on local weather conditions and forecast provided by Apple Weather service. I am beta testing it and hopefully releasing it this Winter.

Screenshot of the Slippery Cities Apple Watch app showing weather based slippery warnings.
Slippery Cities beta showing next five hours slippery warning data based on temperature and precipitation.

The last new app I started in July 2022 I actually never planned to initiate. It just happened. Minesweeper (Swift/SwiftUI, macOS) is another private side project that sporadically advances – or then not when I am too busy doing something I actually get paid for.

Ongoing minesweeper game screenshot.
Minesweeper in action

The classic game, with three different mine field sizes and a top-10 list of results. Some nice SwiftUI animations and sounds (“composed” with GarageBand) when you step on a mine or happen to win.

Probably the reason I started this game project was to have a realistic real world example of using recursion for the students. When the user clicks on a tile, a recursive algorithm is used to open up all the tiles having no neighboring mines for the user. If you have played the game, you’ll know what I mean.

I am planning to move from SwiftUI animations to SpriteKit graphics. I’ve done some learning on the topic but haven’t yet actually started doing it. As a side project, this may happen later rather than sooner…. Unless I decide to continue with SwiftUI animations and then publish this one in the Mac App Store sooner.

OK, then next to the projects started earlier and/or having only minor updates during 2022:

  • Updated a Java console chat client (Java, JUnit, HTTP, JSON) used in the 2021 Programming 3 course (server side programming). Chat client was used as a test client so that students could test their servers. Client also has JUnit tests, sending requests to their servers as students test their HTTP server implementations.
  • Published a GUI chat client (Swift, SwiftUI, HTTP, JSON) for the same Programming 3 chat server. Wanted to try out implementing a GUI chat client using the (then) new Swift async / await features. I implemented this already in 2021 and wanted to release it, perhaps it will help students to try out and learn something else than the usual languages (Java…) used in GUI programming courses.
  • Warnings app (private; iOS/macOS with Swift, SwiftUI and Core Data with Apple Cloud support). Ongoing side project that fetches various warnings (weather, slippery conditions, air quality, etc) from several open data sources and displays alerts to user, warning about potentially harmful or dangerous environmental conditions. Haven’t touched this for a while due to being too busy with paid work. Surprise, surprise.
  • books-cpp demonstration about using C++ map data structures std::map and std::unordered_map in a single and multithreaded app. The demo relates to the Data structures and algorithms course. Learning goal here is to be aware of which container library data structure to select for performance, and that sometimes parallel processing may help but not always, at least significantly.
  • Books and Words (Swift; Xcode, iOS/macOS) – when I knew I would take over the Data structures and algorithms course a couple of years ago, I wanted to brush up my skills in the area and implemented this classic programming exercise. I bought the book Exercises in Programming Style by Cristina Videira and implemented some styles from there in Swift. This year I updated the project with new Swift releases, implemented enum style binary search tree data structure, took new performance measurements, etc.
  • Graphs is a demonstration app I have used in teaching graph data structures. I made just some tiny updates to it this fall.
  • Another demo for the Data structures and algorithms course, SortSpectacle (Swift, SwiftUI, iOS/macOS), now has a new sorting method, Block sort. It is a variant of merge sort.

Then to teaching work at the University. What I did in teaching at Spring/Summer 2022:

  • Taught exercises in Java programming basics in Programming 2 course (around 250 students) for Finnish and English students (separate groups).
  • Taught GUI design/programming (various programming languages) in Programming 4 course.
  • Participated in the national collaboration group of lecturers responsible for data structures and algorithms courses in various universities and tech institutes in Finland. We discuss the pedagogical, technical, etc. topics related to teaching, learning and organizing this kind of courses.
  • Interviewed prospective students over Zoom, applying to our MSc program on software engineering from various countries around the world.
  • Arranged summer courses for Devices and Data networks and Data Structures and algorithms. These were offered as independent study, without actual teaching.
  • Prepared improved materials for two of the courses I an responsible for; Devices and Data networks and Data Structures and algorithms. I made improvements to lectures and exercises based on last year feedback from students and colleagues.

And in Fall 2022:

  • Offered my course Devices and Data networks both in Finnish (252 students) and in English (23 students) separately with three other teachers assisting. Two of them were students I interviewed and selected as part time teaching assistants together with a really nice and professional colleague of mine. Very nice workmates, all of them!
  • Offered another of my courses, Data Structures and algorithms (313 students). As you can see from the projects above, quite a many of those are for this course.
  • Supported a colleague teaching the data structures course for international students. Didn’t participate in teaching the English group though.
  • Preparing (in December) to return – after a very long break – to participate in the study program BSc student projects as a supervisor. Projects launch in the beginning of January. Students plan and execute a software development project for local companies. Teachers supervise them and see that all goes OK, intervene if necessary. I was surprised to see they still use the project documentation templates I created a long time ago in 1998! They’ve been updated since then, obviously.

Last but not least – our study program student guild Blanko awarded me as the Distinguished teacher of the year! This was the second year in a row for me to get this honor! Really taken and humbled that the work I am doing is valued by the students. In addition to the nice award certificate I got a box of various delicacies like chocolate to enjoy. Thanks Blanko!

I am not giving any new year resolutions, but one goal I have is to finish all those side projects this year and put them to actual use somewhere, if anyone is interested or finds these projects of mine fun or useful. Until that happens, I should really, really not start any new side projects…. We’ll see how that goes.

Simple analytics for several Git projects

Last year I had 299 students working on their individual git projects in Data structures and algorithms course. It is a challenge to keep up with the status of each student to guide them ahead in the course!

Thinking about this today, I decided to see if I could create some tooling to help me out in keeping in touch on how students proceed in their course projects.

First tool is a bash script to clone or update the projects from GitLab to my local computer. These scripts were written already 2-3 years ago.

Second (new) script goes through the student repositories on my local computer and creates a git log file for each project, with some specific settings:

git log --numstat --branches --date=iso8601 --output=<file>

Then I have this Swift/SwiftUI app using the new Swift Charts API to generate a status view for all the student projects from the log files. When I press the Load logs button, all project log files are parsed and simple statistics for each repository is then created from the log files.

My tool app and visualisation of some of my own projects

The green bar shows the number of added lines of code so far, the red one shows the number of removed lines of code.

Anonymize -button puts random strings in place of the repository names, in case I need to show the statistics to others that are not supposed to see the student id’s.

Tomorrow starts this Fall implementation of Data Structures and Algorithms. Let’s see if this tool is of any use to us teachers…

When this basic functionality works, I could also add a line chart showing a timeline of individual projects, how lines of code were added when the course proceeds.

Beauty from git logs

I didn’t know — until today — about the existence of Gource. Explained shortly, you can use it to create beautiful animations from the history of git repositories. After installing it, the last couple of hours was spent in watching and recording videos of my projects in git.

The project in this video is called Keywords. It is a demo project I implemented for Software architectures course, implementing a Client/Server app with TCP, session management, client side API to the server and an Android client.

What is interesting to see on the video is how I started the implementation from the Server, then switched to Client, back to Server. Then I implemented a client API for the server as a library (.jar; this is all Java), made modifications to the Client and so on. Every time I needed new functionality:

  • I first implemented the support that on the Server time,
  • then modified the Client API to support that and
  • finally added the support for the feature on the client side.

Basically how incremental development works (may work), doesn’t it?

Installing Gource on macOS was quite simple, with Homebrew:

brew install gource

And then just run it (in some project directory under git):

gource -auto-skip-seconds 1

Most of my projects are ones I work occasionally, some quiet periods in between, so the auto-skip-seconds option is useful to quickly pass these times mostly nothing happened during the project.

Since I had earlier installed ffmpg, it was easy to save the generated animation into a video file:

gource --auto-skip-seconds 1 --title "EasyCrypto demo project (c) Antti Juustila" -1280x720 -o - | ffmpeg -y -r 60 -f image2pipe -vcodec ppm -i - -vcodec libx264 -preset ultrafast -pix_fmt yuv420p -crf 3 -threads 0 -bf 0 gource.mp4

The saved video files can be quite large, so adjusting the -crf option may be a good idea to make the files smaller. Though that also makes the videos not so cool.

I have one project I started 2013 and have worked upon it until January this year. I already watched the evolution of that system with Gource, and it will make a great video. It would be great with subtitles or voice explaining what happens and why. This would be a nostalgic thing to create: the course I have used that system is something I am leaving behind. This Spring is the last time I will teach the course. The video would be kind of a farewell to the system, since it is unlikely I will continue with it without any useful context, like the course has been.

Using CMake

A while ago I was asking in Slack if anyone knew how to write CMake files for C++ projects that work across many platforms, including macOS, Ubuntu and Windows. One said that he has done something multiplatform with CMake, but doesn’t remember how and added:

“I hate tooling in development.”

I guess he referred to using CMake. I sort of agree with him but also not. For example, tying yourself in some specific IDE is not very useful. Only knowing how to work with some specific tools not available on many platforms limits the applicability of your skills. Moving to a different ecosystem or platform, requiring different tools will become more difficult and time consuming.

It is better to learn the lower level tools well, those tools which are shared across platforms and ecosystems. Then you can apply and use those wherever you are developing. That is why I prefer using git on command line — though I do have several git GUI tools installed.

Another thought that came into my mind is that software development without tools just doesn’t happen. We all use tools, whether it is vim, command line git and makefiles, or CMake, Xcode IDE and Fork for git. I prefer to use the tools that fit the problem. Like, if you are doing development for multiple platforms, with multiple compilers and IDEs, then for solving that problem, CMake is a good choice instead of makefiles. It liberates me from the lower level technical stuff of considering how to create makefiles for different OS’s and compilers, allowing me to focus on the actual problem to solve with those tools — creating some code and working systems.

I eventually found the way to create CMake files so that the project I am working on, can be build from the CMake files in Windows 10, Ubuntu and macOS. Also creating projects for Eclipse CDT, Xcode and Visual Studio is quite easy. I can also easily switch from using make to using Ninja as the build engine.

# Creating Ninja build files for a Qt app on macOS from CMake project
cmake -GNinja -DCMAKE_PREFIX_PATH=/Users/juustila/Qt/5.12.1/clang_64/lib/cmake ..
# Creating MSVC build files on Windows 10 from CMake project
cmake -G"Visual Studio 16" -DCMAKE_PREFIX_PATH=C:\Qt\Qt5.14.1\5.14.1\msvc2017_64\lib\cmake;C:\bin ..
# Creating Xcode project files on macOS from CMake project
cmake -GXcode -DCMAKE_PREFIX_PATH=/Users/juustila/Qt/5.12.1/clang_64/lib/cmake ..

What I learned recently is that it is possible to generate dependency graphs from the CMake project file with GraphViz:

# Create the Xcode project and also a dot file 
# for generating a dependency graph using GraphViz.
cmake -GXcode --graphviz=StudentPassing.dot ..
dot -Tpng -oStudentPassing.png StudentPassing.dot
CMake / GraphViz generated dependency graph of an app.

Resulting in a neat graphical representation of the dependencies of your project. Especially handy if you start working with a large system you do not yet know and want to study what libraries and other components it is built using. And teaching software architecture in practice, as I am currently doing: letting students analyse the structure of a system using available tools.

With CMake, I am able to easily combine document generation with Doxygen into the CMake project:

# In your CMakeLists.txt file:
find_package(Doxygen)
if (DOXYGEN_FOUND)
   configure_file( ${CMAKE_CURRENT_SOURCE_DIR}/doxyfile.in ${CMAKE_CURRENT_BINARY_DIR}/doxyfile @ONLY)
   add_custom_target(doc
      ${DOXYGEN_EXECUTABLE} ${CMAKE_CURRENT_BINARY_DIR}/Doxyfile
      WORKING_DIRECTORY ${CMAKE_CURRENT_BINARY_DIR}
      COMMENT "Generating API documentation with Doxygen" VERBATIM
   )
endif(DOXYGEN_FOUND)
# And then generate build files (e.g. for Ninja)
cmake -GNinja ..
# Do the build
ninja
# And then generate documentation using Doxygen 
ninja doc

I began this post with the question about multi platform development, where my problem originally was how to make all this work in Windows while Ubuntu and macOS was no problem.

For Windows, using CMake required some changes to the CMakeLists.txt project files; using CMake macros with add_definitions() due to using random generator engines for Boost uuid class that work differently on Windows than on the other platforms:

if (WIN32)
   add_definitions(-DBOOST_UUID_RANDOM_PROVIDER_FORCE_WINCRYPT)
endif(WIN32)

Windows also requires some extra steps in the build process, mainly due to the fact that while *nixes have a “standard” location for headers and libs (/usr/local/include and /usr/local/lib), in Windows you should specify with –prefix (Boost) or -DCMAKE_INSTALL_PREFIX (CMake) where your libraries’ public interface (headers, libs, dlls, cmake config files) should be installed and where they can be found by other components.

Xcode quick action scripts to jump to GitHub or Bitbucket repository

Stumbled upon this handy little macOS quick action script project in GitHub which support opening the code selected in Xcode in a browser so that the selected code file in GitHub repository is opened and selected lines are highlighted in the browser. Or you could copy the link from Xcode to GitHub hosted project, while from Xcode, and share the link to someone by email or whatever.

Image from the original repo by wojteklu

Neat, wanted to try it out and cloned the project and installed the action scripts. That was easy, just double click on the scripts and they are installed.

I tried this with a project that is actually hosted in Bitbucket.org. Obviously it didn’t work out well. I forked the project, cloned it and copied and opened the action scripts in Automator app, edited the scripts to fit Bitbucket and now I have another pair of scripts which do work also with Bitbucket hosted repositories!

The changes to the scripts were quite easy to implement. Just change .com to .org, and instead of GitHub’s “blob” path, use the Bitbucket’s “src” path for the code files. And instead of addressing code lines the GitHub way (#L54-L58), use the Bitbucket’s way (#lines-33:35). Here’s an example link to a GitHub repo…

https://github.com/anttijuu/PluginDllDemo/blob/0f7b83f7ada5613cb0561a63a8c7d09f95f46144/EasyCryptoReversePlugin/EasyCryptoPlugin.cpp#L54-L58

… and here’s an example of a Bitbucket link (note: these links to BitBucket project ohar2014 are no longer valid since I have chopped the project into separate components in separate repositories):

https://bitbucket.org/anttijuu/ohar2014/src/e6fd26ef3d142d3da0cbe5969e6f037e465cede5/BaseLayer/ConfigurationDataItem.cpp#lines-33:35

The long code in both of the links is the current commit id of the version I’m viewing in Xcode. And here’s the relevant parts of my new shiny Action script source code…

on run {input, parameters}
	tell application "Xcode"
		set activeDocument to document 1 whose name ends with (word -1 of (get name of window 1))
		set activeDocumentPath to path of activeDocument
		set currentLines to selected paragraph range of activeDocument
		set startLine to get item 1 of currentLines
		set endLine to get item 2 of currentLines
	end tell
	
	set repositoryUrl to do shell script "cd $(dirname " & activeDocumentPath & "); git remote -v | grep fetch | awk '{print $2}' | sed 's/git@/https:\\/\\//' | sed 's/org:/org\\//' | sed 's/\\.git//'"
	
	set pathToRepositoryDirLocation to do shell script "cd $(dirname " & activeDocumentPath & "); git rev-parse --show-toplevel "
	
	set activeFilePathInRepository to replace_text(activeDocumentPath, pathToRepositoryDirLocation, "")
	
	set currentCommit to do shell script "cd $(dirname " & activeDocumentPath & "); git rev-parse HEAD"
	
	set bitbucketUrl to repositoryUrl & "/src/" & currentCommit & activeFilePathInRepository & "#lines-" & startLine & ":" & endLine
	
	set the clipboard to bitbucketUrl
	
	return input
end run

…and the script itself installed and visible in the Xcode menu!

Action scripts installed for Bitbucket.

I also made a pull request to the original project, in case he wants to merge my contribution into it.